Problem:
Server 2012/2008 R2 unlike their predecessors, comes with the multiple remote desktop session restriction enabled. If you are only connecting to a server for remote administration purposes that can get a bit annoying, especially if you have a generic administrative account that multiple techs are using, and you keep kicking each other off the server.
Just as with earlier versions of Windows server you CAN have two RDP sessions at any one time, the restriction is one logon for one account. Thankfully you can disable the restriction and there are a number of ways to do so.
Solution:
Server 2008 R2 Option 1: Enable Multiple RDP sessions from TSCONFIG
Note: tsconfig.msc does not work on Windows Server 2012


1. On the server, click Start and in the search/run box type tsconfig.msc{enter}. Locate "Restrict each user to a single session" Right click > Properties.
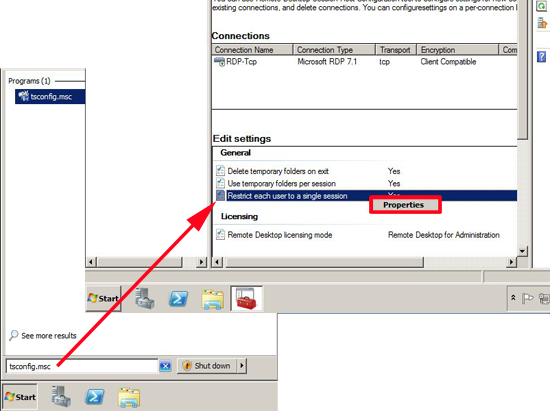
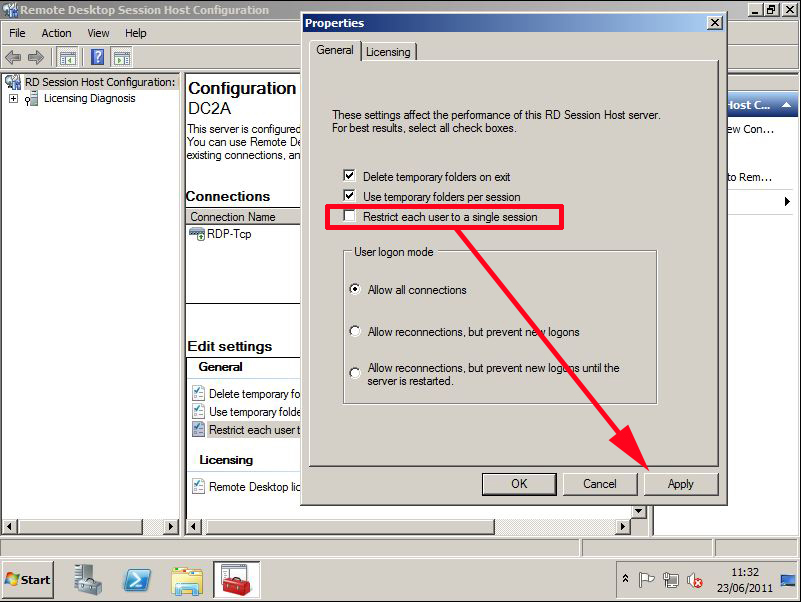
2. Remove the tick from "Restrict each user to a single session" > Apply > OK.
Server 2012 and 2008 R2 Option 2: Enable Multiple RDP sessions via the registry
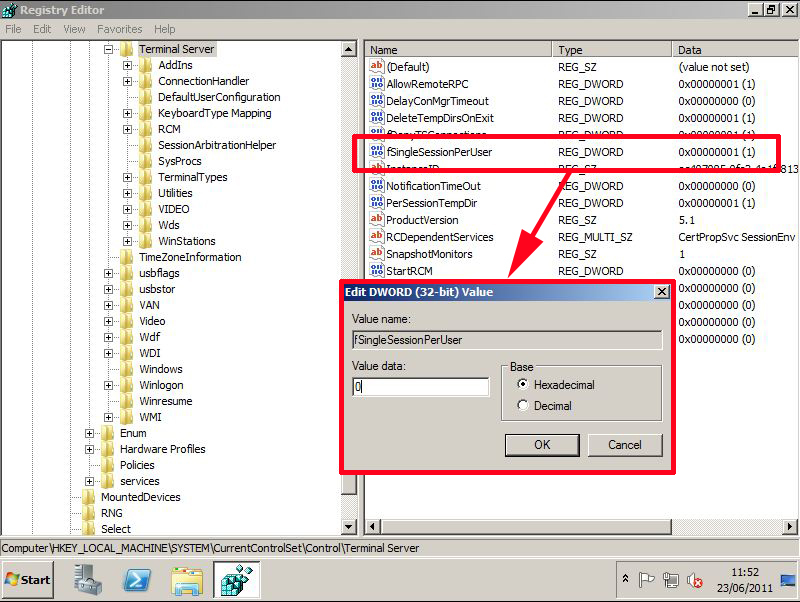
1. Start > in the search/run box type regedit {enter} > Navigate to:
HKEY_LOCAL_MACHINESYSTEMCurrentControlSetControlTerminal Server
Locate the fSingleSessionPerUser value > Set it to 0 (Multiple sessions allowed), or 1 (Multiple sessions NOTallowed).
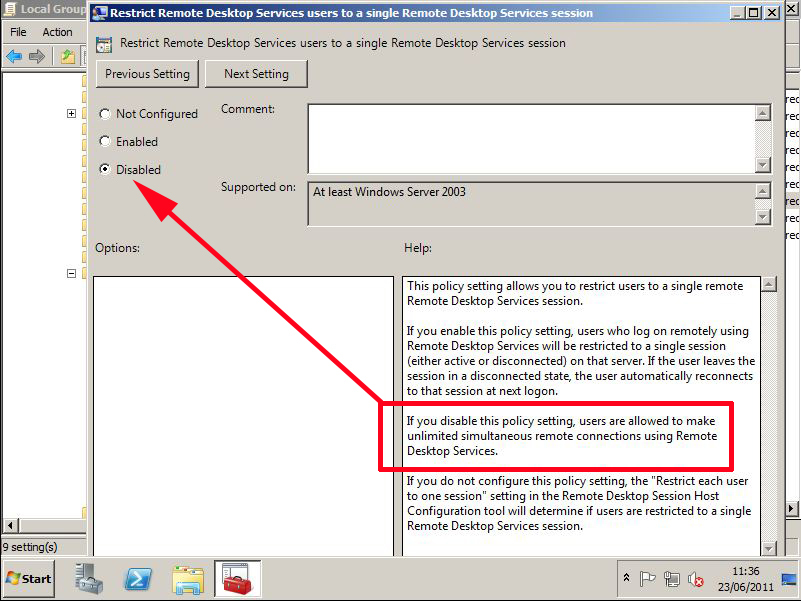
Server 2012 and 2008 R2 Option 3: Enable Multiple RDP sessions via Local Policy
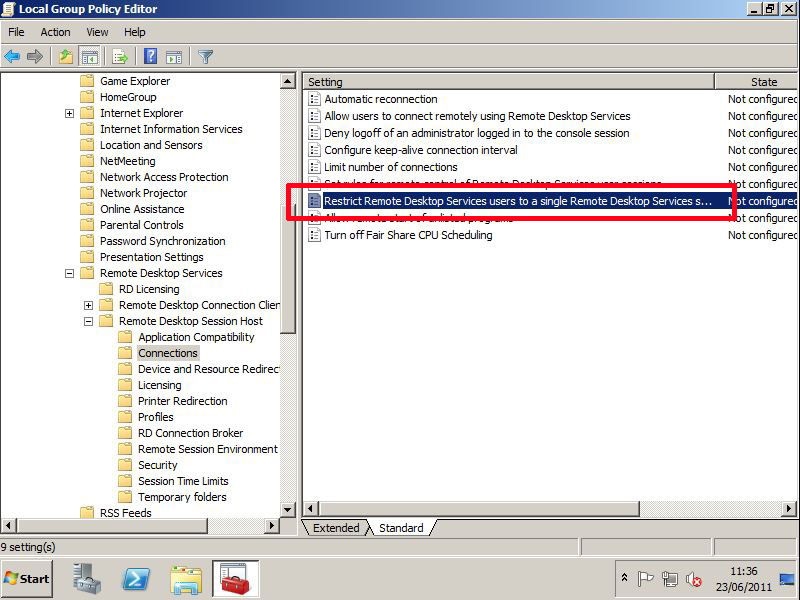
1. Start > in the search/run box type gpedit.msc {enter}.

2. Navigate to:
Computer Configuration > Administrative Templates > Windows Components > Remote Desktop Services > Remote Desktop Session Host > Connections
Locate the "Restrict Remote Desktop Services users to a single Remote Desktop Services session" setting.
3. To enable multiple sessions set the policy to disabled > Apply > OK.
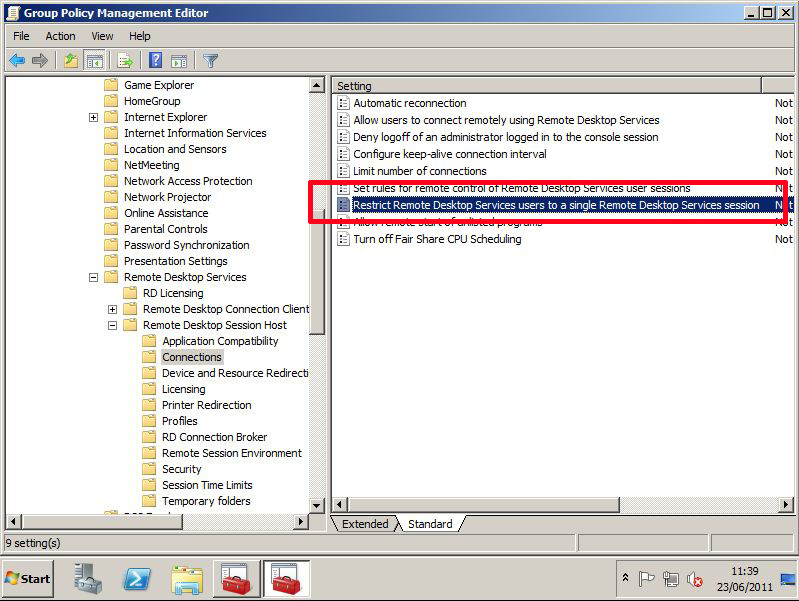
Server 2012 and 2008 R2 Option 4: Enable Multiple RDP sessions via Group Policy
1. On a domain controller > Start > in the search/run box type gpmc.msc {enter}.

2. Either edit an existing GPO that's linked to your COMPUTERS, or create a new one and give it a sensible name.
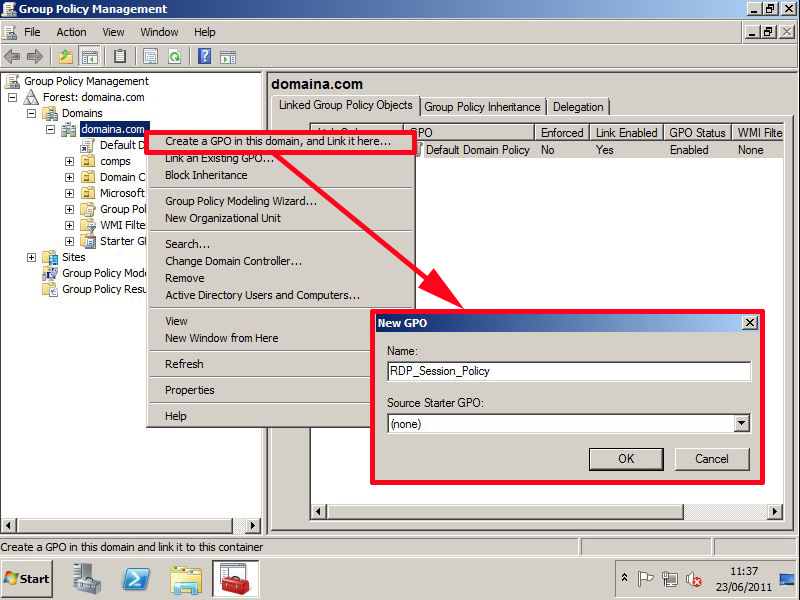
3. Navigate to:
Computer Configuration > Policies > Administrative Templates > Windows Components > Remote Desktop Services > Remote Desktop Session Host > Connections
Locate the "Restrict Remote Desktop Services users to a single Remote Desktop Services session" setting.
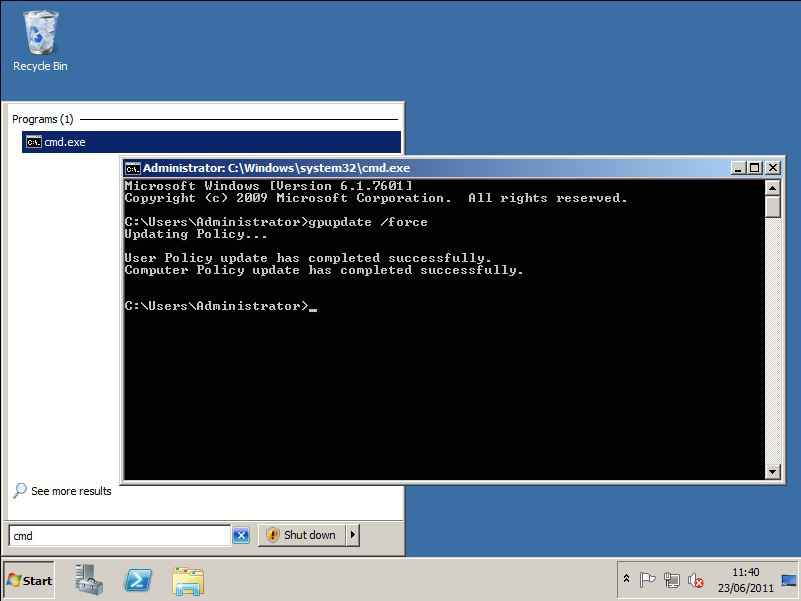
4. To enable multiple sessions set the policy to disabled > Apply > OK.

5. Then either reboot the clients, wait a couple of hours, or manually run "gpupdate /force" on them.
OR
Configure the Number of Simultaneous Remote Connections Allowed for a Connection
Applies To: Windows Server 2008 R2
You can configure the number of simultaneous remote connections that are allowed for a connection. Restricting the number of simultaneous remote connections can improve performance of the computer because fewer sessions are demanding system resources.
If the RD Session Host role service is not installed on the computer, a connection can only allow a maximum of two simultaneous remote connections to the computer.
Use the following procedure to configure the number of simultaneous remote connections allowed for a connection.
Membership in the local Administrators group, or equivalent, on the RD Session Host server that you plan to configure, is the minimum required to complete this procedure. Review details about using the appropriate accounts and group memberships athttp://go.microsoft.com/fwlink/?LinkId=83477.
To configure the number of simultaneous remote connections allowed for a connection
- On the RD Session Host server, open Remote Desktop Session Host Configuration. To open Remote Desktop Session Host Configuration, click Start, point to Administrative Tools, point to Remote Desktop Services, and then click Remote Desktop Session Host Configuration.
- Under Connections, right-click the name of the connection, and then click Properties.
- In the Properties dialog box for the connection, on the Network Adapter tab, click Maximum connections, enter the number of simultaneous remote connections that you want to allow for the connection, and then click OK.If the Maximum connections option is selected and dimmed, the Limit number of connections Group Policy setting has been enabled and has been applied to the RD Session Host server.
You can also set the maximum number of simultaneous connections allowed for an RD Session Host server by applying the Limit number of connections Group Policy setting. This Group Policy setting is located in Computer Configuration\Policies\Administrative Templates\Windows Components\Remote Desktop Services\Remote Desktop Session Host\Connections and can be configured by using either the Local Group Policy Editor or the Group Policy Management Console (GPMC). Note that the Group Policy setting will take precedence over the setting configured in Remote Desktop Session Host Configuration.