Thursday, 28 February 2013

Install Windows Media Player 11 In A Non-Genuine Windows XP

So here’s how you can easily install WMP11 on your non-genuine Windows XP. Here’s what you need
1] The Windows Media Player executable. DO NOT DOWNLOAD IT FROM MICROSOFT’S HOME PAGE. Get it from here, or here. If none of these work, Google for it, useless.
2] WinRAR. Get it from here.
3] Fifteen minutes ;-) [Actually, this depends on the speed of you internet connection, and the resources of your PC]
Here are the steps. Follow them in the exact order, after turning off your Internet Connection.
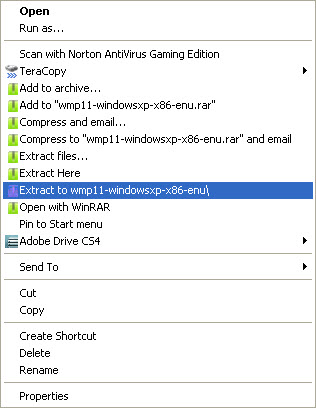
1] After you’ve downloaded Windows Media Player 11 from the given links, and also installed WinRAR, right-click on the executable i.e wmp11-windowsxp-x86-enu, and click Extract to wmp11-windowsxp-x86-enu/. This will only work if you have WinRAR installed. (I guess other archivers such as PeaZip might work as well, but you see, this is tried and tested]


12

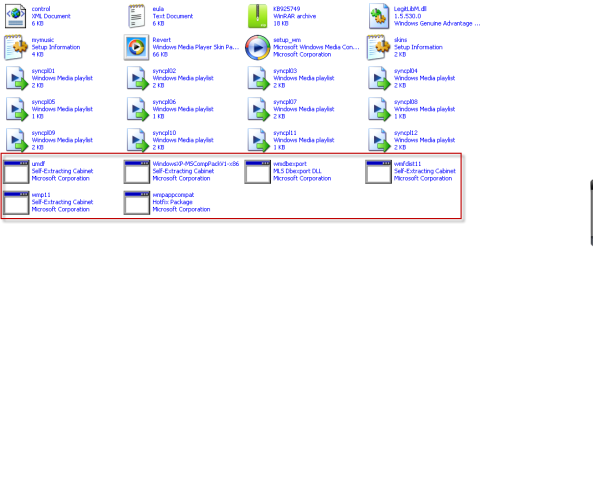
2] After the extraction is done, open the wmp11-windowsxp-x86-enu folder. You’ll see this big list of files. Ignore all, but the last two rows, which is full of icon-less executables.
2

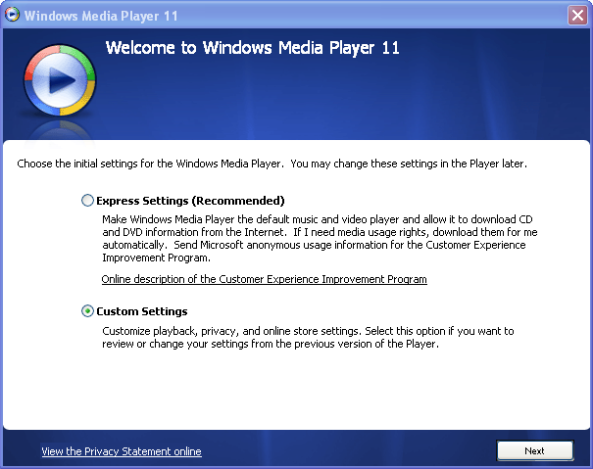
3] Now, run the wmp11 file. Follow the procedure, and finish the install. Go to Start, All Programs, and click on Windows Media Player. You should now be greeted by these windows, which’ll make you feel WMP11 is already installed. Choose Custom Settings in this, click Next and…
4

… uncheck all the boxes in this, and click Next.
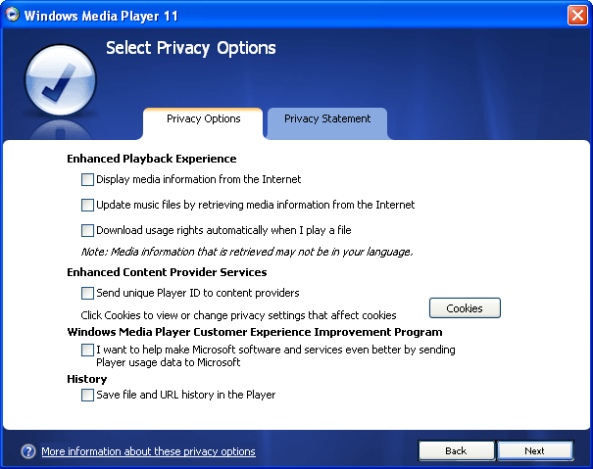
3

4] Now, you must see an error, telling you that the wrong version of WMP is here when something else was expected, or some crap like that. Click No, and go back to the wmp11-windowsxp-x86-enu folder (which you saw in Step 2).

5] Install all the remaining executables, in the exact order I tell you (They’re all in the same order anyway):
1] umdf
2] WindowsXP-MSCompPackV1-x86
3] wmdbexport
4] wmfdist11
5] wmpappcompat
Installing all these should be easy, as all you have to do is click Next. One thing though, do check those boxes, which prompt you to restart Windows. Notice that I’ve left out wmp11, as you’ve already installed that.

6] Now, re-install wmp11, and re-do Step 3. Now…


… Ka-chow!

Hope this worked for you (it sure did for me and a couple others). Comment if it worked, or didn’t!

Saturday, 23 February 2013

HTTP Error 500.24 - Internal Server Error

An ASP.NET setting has been detected that does not apply in Integrated managed pipeline mode.

The above error is a usual and simple error. Only make sure following settings are correct

Right click on your website and take advanced settings as below


In advanced settings change apppool as below


Tuesday, 12 February 2013

The Fastest And Most Easiest Method To Make Bootable Windows Installation USB Disks

Preparing bootable USB drives has always been a not so easy task requiring a combination of tricks, hacks and tools, thanks to freeware utility WinToFlash this won't be the case any longer as it allows users to create bootable USB disk drives having Windows XP, Windows 2003, Windows Vista, Windows 2008, Windows 7 installation or any other BartPE compatible environment from CD/DVD to USB in a fast and automated way.
WinToFlash USB Setup Creator
Apart from preparing bootable Windows installation and BartPE USB disk drivers WinToFlash also supports making of bootable MS-DOS disks.
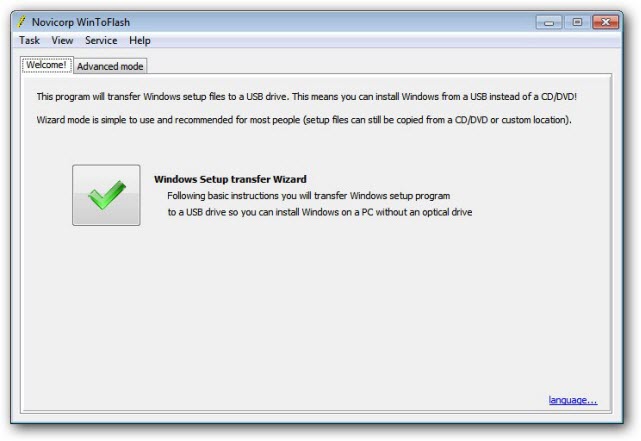
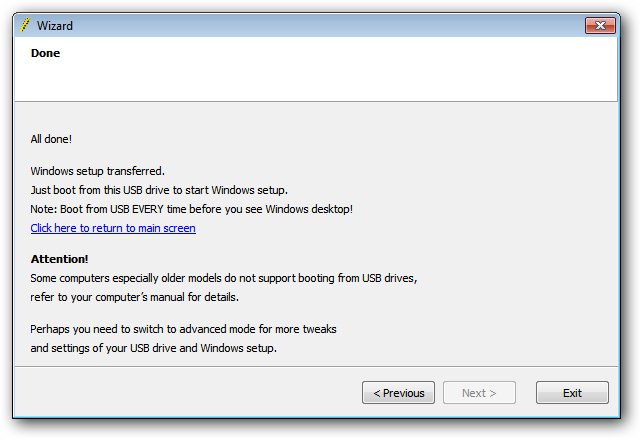
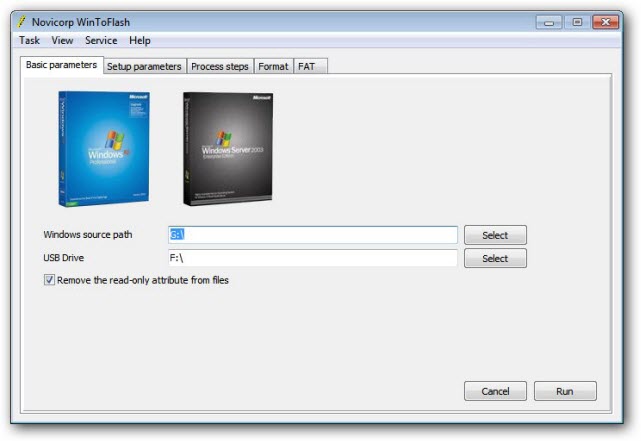
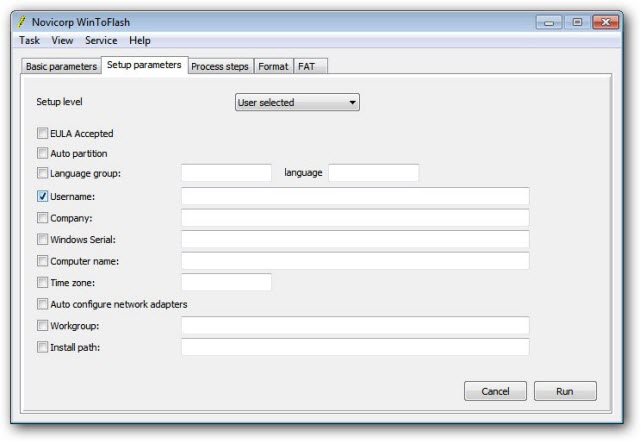
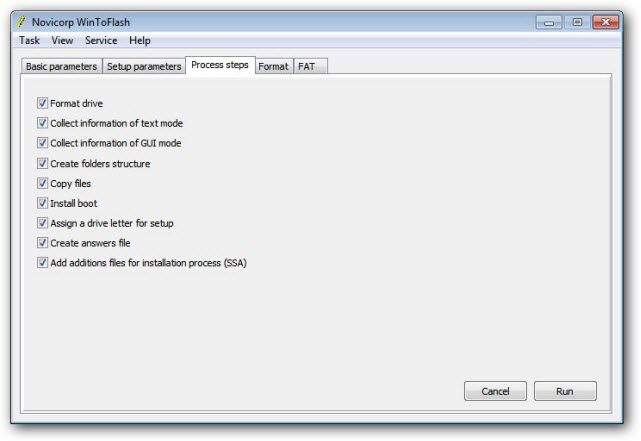
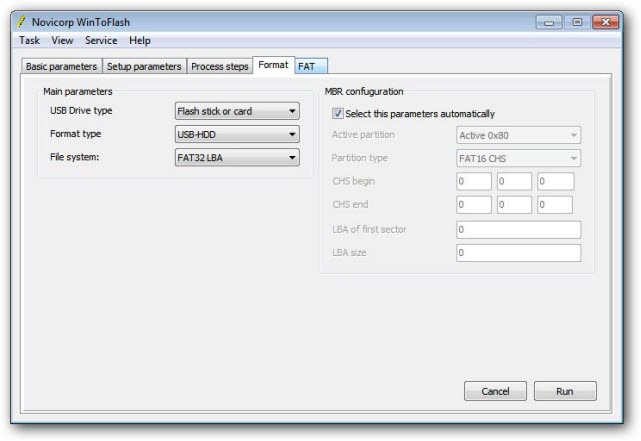
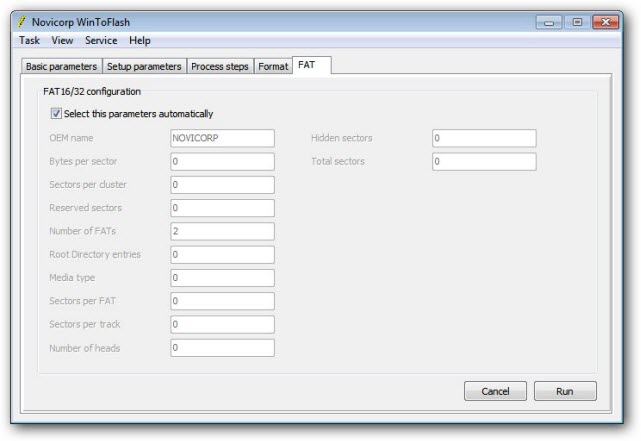
WinToFlash provides both an easy to use wizard-mode for fast and easy bootable disk creation, coupled with an Advanced-mode letting users customize settings as per their choice as shown below.
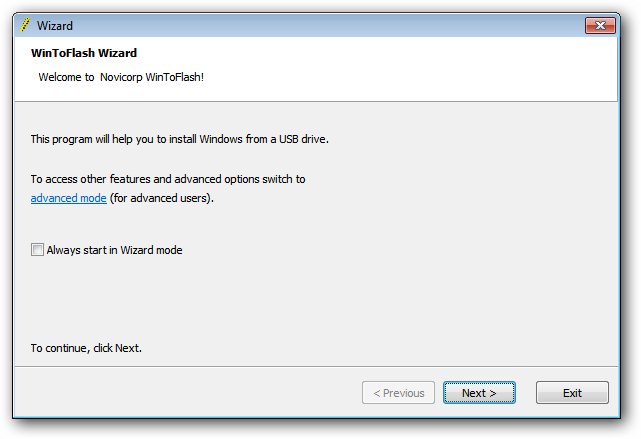
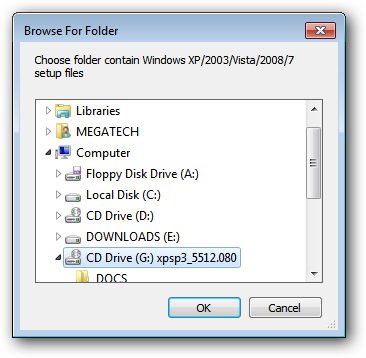
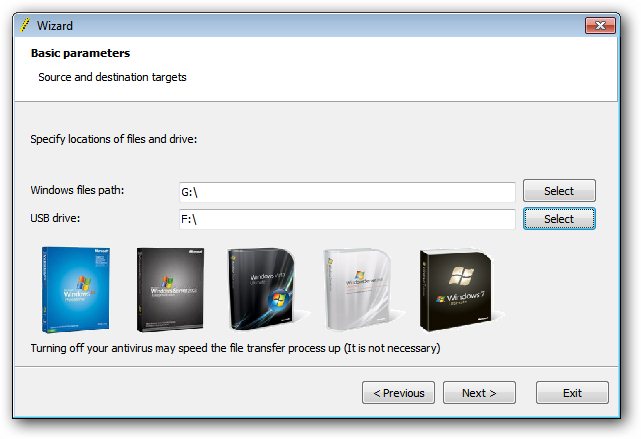
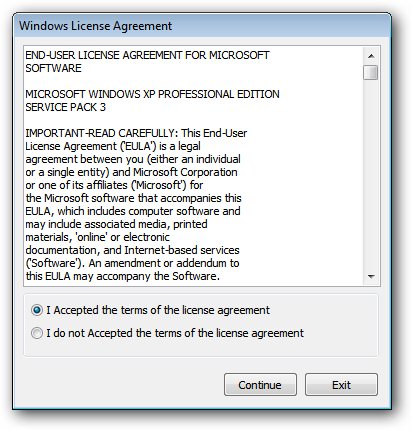
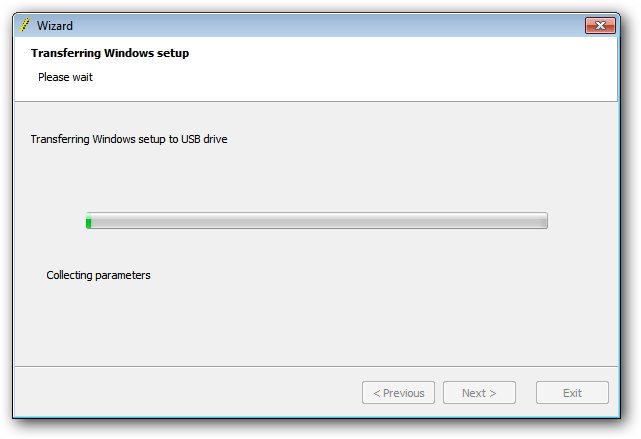
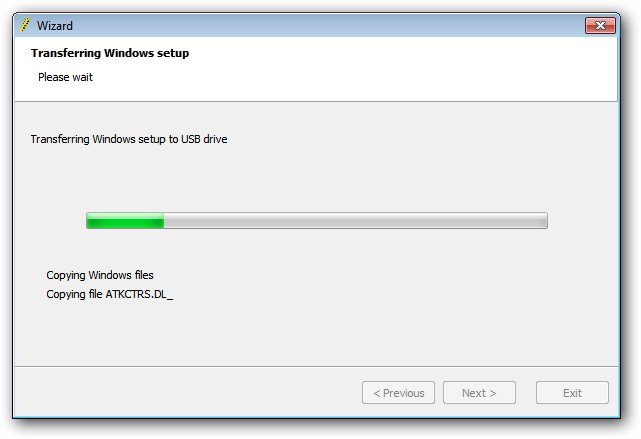
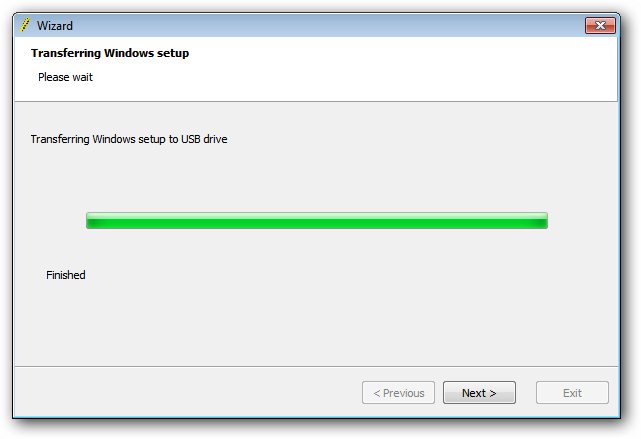
Photo Walk-through Of Wizard Mode To Create Bootable Windows Setup USB Disk


WinToFlash Advanced Mode With USB Installation Disk Customization Options


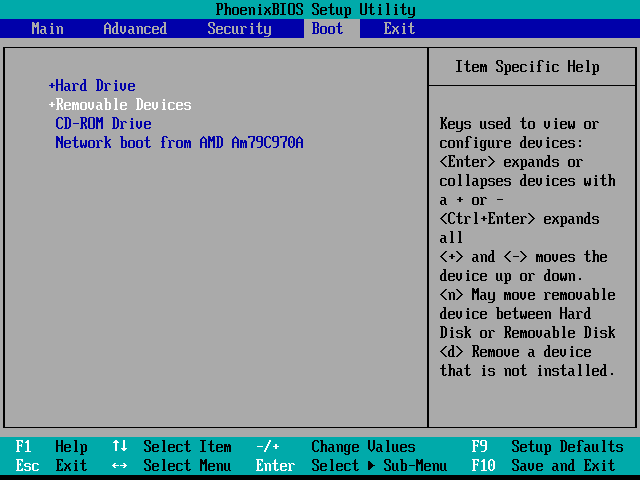
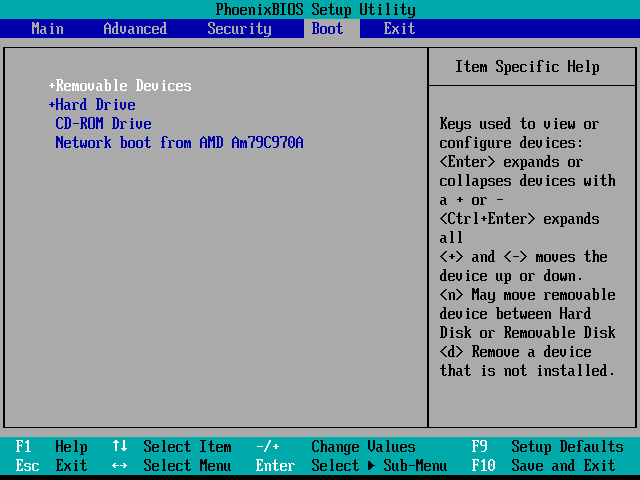
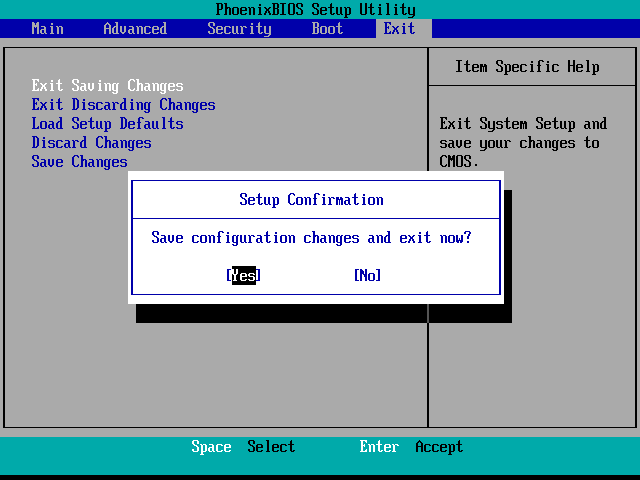
To boot from the USB disk you must make it the first-boot device in BIOS as below :
  1. With the bootable USB flash drive inserted in your computer, restart the machine.
  2. Enter the BIOS setup menu to change the boot device priority setting.
  3.  
  4. BIOS 
     
  5. Change settings to make Removable drive the first option.
  6.  
  7. BIOS 
     
  8. Exit the BIOS setup making sure you save the changes.
  9.  
  10. BIOS
WinToFlash Download Link :

Monday, 11 February 2013

Services.Msc is Not Showing Services in Extended View in XP

It sounds like your jscript.dll file has somehow become unregistered, so you can reregister it.

To do that, click Start, Run and in the box enter:

regsvr32  jscript.dll

Click OK and then you should see a message like this:

DllRegisterServer in jscript.dll succeeded.

It is fine to register the DLLs even if they are already registered.

If you did not unregister the DLL yourself. perhaps your system has some malicious software infection.

I would follow up with this:


Perform some scans for malicious software, then fix any remaining issues:

Download, install, update and do a full scan with these free malware detection programs:

Friday, 11 January 2013

Printer Settings could not be saved. Operation could not be completed (Error 0x000006D9)

Error message when you use the Add Printer Wizard to share a printer:

This issue may occur if you have stopped or disabled the Windows Firewall Service. To share printers in Windows 7 or in Windows Server 2008 R2, you must have the Windows Firewall Service enabled.

To resolve this issue, set the Windows Firewall Service to Automatic, and then start the service. 

Monday, 7 January 2013

How to quickly delete all auto shapes in Excel?

Delete all auto shapes in active worksheet with VBA

Using VBA macro can help you delete all auto shapes in active worksheet quickly.

Step 1: Hold down the ALT + F11 keys, and it opens the Microsoft Visual Basic for Applications window.

Step 2: Click Insert >> Module, and paste the following macro in the Module Window.

VBA: delete all shapes in active worksheet.

Sub DeleteShapes()
Dim Shp As Shape
For Each Shp In ActiveSheet.Shapes
Shp.Delete
Next Shp
End Sub

Step 3: Press the F5 key to run this macro.
Then you will see all shapes in active worksheet are deleted quickly.

Notes:
1. This VBA macro can only delete all shapes in active worksheet.

2. This VBA macro can delete all kinds of shapes in active worksheet, including pictures, ClipArt, Shapes, SmartArt, charts, Text boxes, etc.

Friday, 28 December 2012

How to enable multiple remote desktop user logins in Windows 7

Windows remote desktop connection application can be used in order to connect to another PC on the same network or the internet. Both computers should use Windows and have the “Remote desktop connection” application available. For example, you can use all of your work computer’s programs, files, and network resources from your home computer, and it’s just like you’re sitting in front of your computer at work. You can also use it to access an application that is only installed on a single computer, by multiple users at the same time.
Windows 7 do not allow the concurrent use of a single computer by multiple users. This means that a user needs to be signed out before a second user logs in. This is not the case for the server editions of Windows. Luckily there is a patch that allows you to override this setting and connect multiple users at the same time on a single computer. The will even be able to use the same applications at the same time.
CAUTION: The following steps are probably going against the windows EULA agreement and could cause harm to your computer. I have already tested both of the patched below on windows 7 professional edition installations and could not find any issues.

Patch 1

The first patch just enables multi-user support for the Windows remote desktop connection tool:
  1. You need to download the following zip file: Win7RDP.zip.
  2. Unzip the contents in a folder (let’s say you have used the following path:  “C:\Win7RDP\”).
  3. Execute the file install.cmd by double clicking on it.
  4. You should see a screen similar to the one below, if everything works fine.
    multipleremoteusers1 How to enable multiple remote desktop user logins in Windows 7
  5. After the end of the patching process the remote desktop connection of your pc provides multi-user support.

Patch 2

The following patch application lets you choose whether or not to enable multiuser support for the remote desktop connection process or/and to disable the no blank password policy that is enforced on users that need to connect remotely. Follow the steps below to access the application.
  1. Download the file Concurrent_RDP_Patcher_2-22-2011.zip
  2. Open the compressed file and execute the file “Concurrent RDP Patcher.exe”
  3. You should see the following screen
    rdppatcher How to enable multiple remote desktop user logins in Windows 7
  4. Check the desired options and then click the patch button.