Friday 28 October 2011

How to Block Facebook on Windows 7 Home Computer

As you don’t have proxy servers at home, we have to do it in other ways. 5 methods available here, take which one suites for your and others (blocking for them).

Methods to Block Facebook on Windows 7 Home Computer.

1) Block it on Internet Explorer. – Method 1

You can easily block websites on Internet explorer 8 on Windows 7. To do it,  Go to Tools – > Internet Options and select content tab.

How to Block Facebook on Windows 7 Home ComputerClick on Settings.  Go to Approved Sites tab and type facebook.com and press Never button.

How to Block Facebook on Windows 7 Home ComputerIE8 will prompt for Content advisor password, give a good password which can not be guessed by others.  Still it is not done.
Go to General tab and make sure to select ‘ Users can see websites that have no rating’ option under User options. if you don’t select this, most of the sites will stop working no matter approved or denied sites.
Contend advisor should be enabled, once its enabled you can view screen as below.

disabled_contentadvisor
Now its done. when ever some body try to access facebook on internet explorer 8, it will pop up for content advisor password to allow particular site.

Problems with method

1) This works only with Internet Explorer. If your computer is having other browsers such as Firefox, Chrome or Safari then this is useless.
2) Your other party will know its blocked by some body ( it’s you!) and they will irritate you for the password or remove the block( you can disable password popup under settings) because its your home, not office.
3) There is a method to remove content advisor password without knowing it. Don’t worry I’m not going to tell how it is.

2) Block it in Host file. – Method 2

This is very simple method and no body will know this. Before any internet browser access web sites, it checks the DNS entry in Host file which is in your computer. if no entry found for specific website, then it goes to ISP ( Internet Service provider) to get the IP address.
So, what we will do now is, enter facebook entry on Windows 7 host file with wrong IP address.
Any browser find this entry and try to load from the IP address which is completely wrong. Finally facebook will not load ( that is what we wanted). To do it, Make sure you have administrative privilege to edit this host file.
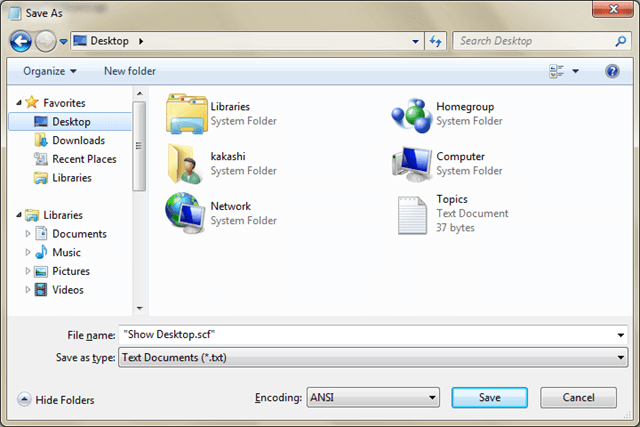
Go to following location and open hosts file in notepad or any text editor.

hostfile

127.0.0.1                     login.facebook.com
127.0.0.1                     www.facebook.com
127.0.0.1                     blog.facebook.com
127.0.0.1                     apps.facebook.com
127.0.0.1                     en-gb.facebook.com
Type IP address and Press Tab key then type above addresses. 127.0.0.1 is the local host IP.
Restart the machine and try facebook, it will not work. This method will stop any browsers to access facebook.com.

Problems with this method

If other party have administrative access and know about host file entry, then this method is not valid as they can simply remove these entries.

3) Block it on your Internet Router. – Method 3

This is more technical and limited because it  depends on your ADSL router. It can vary  for each routers, therefore I cant tell where to find it. Mostly under security (WAN) you can find some options to block websites with IP addresses or specific words.  These are the IP address of facebook.com
69.63.181.11
69.63.181.12
69.63.189.11
69.63.189.16

4) Block Facebook with Parental Control in Windows 7. – Method 4

This method mostly suitable for kids.  If you are looking to block only facebook website then I suggest to use Internet explorer content advisor as mentioned in method 1.  Filtering and blocking websites by windows 7 parental control is more complicated and advanced.
This feature is not a built in component, you have to download Windows Live Family Safety from Microsoft site here.
While installing make sure to select  Family Safety check box.

How to Block Facebook on Windows 7 Home Computer
Once Installation done, go to Parental control in control panel. Select the windows user you want to block facebook and click on the option mentioned below, you have to enter windows live id and password.
windows_live_familysafety Further settings can be modified on live website. Here is the way to block websites in Windows live family safety on Windows 7.

family_safety on windows 7

5) Third Party Parental Controls. – Method 5

There are several paid and free parental controls available to block internet sites. You can use them also.
I”m sure above steps will be useful for you in any cases. Do share here if you know more ideas to block Facebook on Windows 7 home computer. I decided to write more about facebook on sysprobs.com.

Restore Show Desktop icon in Windows 7 and Vista


By default, the Quick Launch toolbar comes with a Show Desktop button, which allows you to quickly hide all open windows and access stuff on your desktop, and then quickly bring them all back when you’re done.
But what if your Quick Launch toolbar doesn’t have one? If your Show Desktop icon got deleted in Windows XP, you could always restore the Show Desktop icon easily.

Unlike most other toolbar buttons, the Show Desktop button isn’t a Windows Shortcut. Rather, it’s a Shell Command File (.scf), which is really just a plain-text file containing a special command Windows understands. To create a new .scf file, open your favorite plain-text editor (or Notepad), and type the following five lines:

[Shell]
Command=2
IconFile=explorer.exe,3
[Taskbar]
Command=ToggleDesktop


Save the file as Show Desktop.scf (or any other name, provided that you include the .scf filename extension) anywhere you like, including your desktop.

image

You should see the icon appear on your desktop:


image

How to configure a router for remote desktop

Setup router for Remote Desktop

First, you need to log into your wireless router at home by typing in the local IP address for the router in your Internet browser. If you don’t know the IP address of the router, go to Start, Run, and type in CMD. Then type IPCONFIG and the address for the router is the Default Gateway entry.

configure router remote desktop

Now type that into your browser and log into your router. If you do not know the admin username and password for your router, you can reset the router by pressing the reset button on the back and then go to any one of these default router password list sites:
http://www.phenoelit-us.org/dpl/dpl.html
http://www.routerpasswords.com/
http://www.governmentsecurity.org/articles/DefaultLoginsandPasswordsforNetworkedDevices.php
Once you are into the router, look for anything along the lines of Port Forwarding, Virtual Server, or Applications and Gaming. I tried to find a couple of screenshots of how it would look on LinkSys, D-link and Netgear:

linksys port forwarding
dlink port forwarding
netgear port forwarding

Now you will either be able to choose the service from some kind of drop down that will have a list like FTP, HTTP, TELNET, etc and if they have Remote Desktop or RDP, then choose that. Type in the IP address in the corresponding box and you’re done.
If the service does not show up in the list, then you have to either add a custom service or there will be some blank boxes where you can enter in the information. On my Linksys router, for example, I have a bunch of empty text boxes in a table.
I would enter Remote Desktop for the application name, 3389 for the internal port, 3389 for the external port, choose both TCP and UDP as the protocol, type in the IP address for the computer I want to connect to, and check the enabled box.

setup remote desktop router

On a D-link router, it’s called Private port and Public port instead of internal and external port, but it’s always the same number 3389, so you can’t get confused. On Netgear, it’s called Start port and End Port.
Now everything should be set for you to connect to your computer from outside the local network. In order to connect from outside, you will have to get your external IP address, which is simple. Just go to www.whatismyip.com and it will give you your external IP address.

what is my ip address

The only issue that can come up is if your do not have a static IP address with your ISP. Most home users get a dynamic IP address that changes every so often. This makes it extremely hard to connect remotely because it will fail once the IP address changes.
In order to fix this problem, you can read my in-depth article from Online Tech Tips that talks about how to setup Dynamic DNS for remote desktop to your PC. Any questions? Post a comment! Enjoy!

Cannot see other computers on network in My Network Places?

File and Printer Sharing is turned off

If File and Printer Sharing is not turned on, you will never see another computer across the network. This protocol must be installed in order to be able browse for it from My Network Places.
To enable File and Printer Sharing, go to the Control Panel, then Network Connections, right-click on Local Area Connection, and choose Properties.

my network places empty

On the General tab, make sure the following protocols are installed and checked:
  • Client for Microsoft Networks
  • File and Printer Sharing for Microsoft Networks
  • Internet Protocol (TCP/IP)
internet protocol

If it’s not there, click the Install button and add the above protocols to the list and restart your computer. If these are installed correctly, then move on to the next check.

All computers are in the same workgroup

The second thing that needs to happen in order for another computer on the network to show up in your My Network Places list is that all the computers have to be in the same workgroup or domain.
You can check this by right-clicking on My Computer, choosing Properties, and clicking on the Computer Name tab.

computer name tab

Next to Workgroup, you will see the workgroup name. Each computer on the network has to have exactly the same workgroup name in order to be able to see each other. You can click Change to change the name of the workgroup.

Allow File and Printer Sharing in Windows/3rd party Firewall

Once you have enabled File and Printer Sharing, you still may not be able to see other computers on the network if you have the Windows XP Firewall enabled.
By default, Windows does not allow the File and Printer Sharing service access through the firewall, so you have to manually allow access. You can do this by going to Control Panel, clicking on Windows Firewall and then clicking on the Exceptions tab.

file and printer sharing

Make sure to CHECK the box next to File and Printer Sharing. Now the service will be allowed access through the firewall and you will be able to see if in My Network Places.
Note that if you have other firewall or Internet security software installed, it can also prevent Windows Networking features to function properly. One prime example of this is Norton Internet Security. You have to tell it which subnet to allow through the firewall or you have to uninstall it.

Open ports on your router

Another source of headaches could be the firewall on your router. If you have a newer router, some of them automatically enable their own firewalls! So you have to log into your router and open the ports manually.
The File and Printer Sharing port numbers range between 135 and 139, so if you open those up on your router, it should be enough to see the other computers on the network. You can also try disabling the firewall to test whether it’s the router that is causing the problem.

Ping other computers on the network

One other simple thing to do is to check whether you can even ping the other computers on the network. If you can’t ping them, then that means that there is something wrong with the network connection itself.
You can ping another computer by going to Start, clicking on Run, and typing in CMD. In the command prompt, type in ping x.x.x.x or ping computername.

ping computer

Switch between Static and DHCP IP address

Another way to try and solve this issue is to switch the computer over to a static IP address and then switch it back to DHCP. When you switch like that, the TCP/IP configuration is reset and any corrupted IP settings like the Subnet mask, etc are fixed.
You can do this by right-clicking on Local Area Connection, choosing Properties, and then selecting the Internet Protocol (TCP/IP) entry and choosing Properties.

tcp ip protocol

Then click Use the following IP address and type in an IP address that would work on your current network. Also choose Use the following DNS server addresses and type in the IP address of your router.
Click OK and then OK again. After that, go back to that screen and choose Obtain and IP Address automatically for both and click OK.

browse computers on network

This should hopefully fix any problems you are having with not being able to browse computers on your network. If this didn’t fix your problem, post a comment and I’ll try to help! Enjoy!

Enable or disable Windows firewall from command prompt

First, to see whether the Windows Firewall is enabled on a server or computer, type this command at the command prompt:
netsh firewall show opmode
You should get something similar to what is below:

firewall netsh

Depending on how many network adapters you have installed on your computer, you’ll see three or more listings. Operational Mode means if the Firewall is turned on or off. Exception mode is if exceptions are allowed or not. Enable means on.
To enable the Firewall in Windows, simply run this command:
netsh firewall set opmode enable
Pretty simply eh? Now what if you want to add a port exception (open a port) to the Firewall using the command line? That’s simple too!
Let’s say you wan to open port 3389, which is for remote desktop in Windows. You would simply run this command:
netsh firewall add portopening TCP 3389 RDP enable subnet
The way the command works is by using the netsh firewall add portopening command, following by the protocol (TCP, UDP), followed by the actual port number, followed by a name (anything you want) and then the enable subnet command.
If you were to run this command then go view the exceptions in Windows Firewall, you would see that the item is now checked:

firewall command prompt

Pretty neat eh!? This is also useful for any headless Windows 2008 Server Core machines that you can only access via the command prompt. Enjoy!

Connect Two Computers using a Crossover Cable

Step 1 – Configure IP Addresses

Usually, if you are using a crossover cable to connect two computers, the computers are not connected to a LAN network. In this case, you will need to configure static IP addresses for each computer.
You have to make sure that both computers have IP addresses that are on the same subnet. For example, if you give one computer an IP address of 192.168.0.1, then you should give the second computer an IP of 192.168.0.2.
If you used the above IP addresses, you should use a subnet mask of 255.255.255.0. If you use an incorrect subnet mask, the connection will not work.
Lastly, the value for the default gateway should be the same on both machines. You can pick which IP address you want to use, but use it on both computers for the default gateway. Below is how my setup looks for one computer:

connect two computer crossover cable

Step 2 – Crossover Cable

The second thing you need to verify is that you actually have a proper crossover cable. Basically, there are a few different types of crossover cables, but it’s best to get the standard crossover cable where the green and orange pairs are swapped and the brown and blue pairs stay in the same position.

crossover cable
The only pins that need to be crossed are 1,3 and 2,6. So just check your cable on both end and make sure it matches the diagram.

Step 3 – Local User Accounts

If you’re having problems accessing files both ways, you may have to create a user account on each computer that has the same name and same password. This helps get past any kind of Access is Denied errors that may pop up.
Make sure the accounts are administrator accounts also! It’s best to create a new account rather than rename a current account.

Step 4 – Disable Firewalls

Finally, you should disable the firewall on both computers to ensure that none of the file sharing ports are being blocked. You can do this by going to Control Panel and then Windows Firewall. Click on Off.

connect two computers

That’s about it! If you follow all these steps, each computer should be able to access the other properly. If you are having problems, post a comment here and I will try to help! Enjoy!

Change the Registered Owner Name in Windows 7

When Windows 7 is first installed, Microsoft asks you a series of questions about the owner of the computer upon which the operating system is being loaded. Once you choose the name of the owner, Microsoft uses this information as the person to whom Windows 7 is licensed.
If you bought your computer with Windows 7 pre-installed, the manufacturer may have included this information for you. If you bought your computer second hand, the operating system will show the original owner as the person to whom the operating system is licensed. Either way, using a quick registry edit, you can change the name of the registered owner to anyone you want.

Windows 7 License

To see the name of the person to whom your copy of Windows 7 is licensed, click on Start and type
winver
into the Search Programs And Files box. Press the Enter key and Windows 7 brings up the About Windows window. Here you will find all kinds of information including the edition of Windows you are using, the current version of the operating system, and the person who holds the license to use Windows 7.

About Windows 7

Notice that this particular owner simply identified him/herself as “user” for the licensing information. Using a quite registry edit, you can change this name to anything you want.
However, be advised that changes to the registry can cause your computer to become unstable if you make an incorrect entry or delete a particularly important registry key. It is advised that you always make a backup of your registry before you make any changes.

Change the Name of the Registered Owner

To change the name of the registered owner of the Windows 7 license, begin by click on Start and typing
regedit
into the Search Programs And Files box. This will bring up the Windows 7 registry. Depending on your settings, you may have to verify that you want to run the registry editor.

Windows 7 Registry Editor
Locate the registry key located at:
HKEY_LOCAL_MACHINE\SOFTWARE\Microsoft\Windows NT\CurrentVersion\RegisteredOwner
Double click on RegisteredOwner and change the key’s string value to whatever name you want.

Change the Name of the Registered Owner in Windows 7

Now when you check the name of the owner by clicking on Start and typing winver into the Search Programs And Files box, your new name should appear instead of the old one.

The New Registered Name in Windows 7

Keep in mind that this trick is cosmetic only; it does not change the actual owner of the Windows 7 license in the legal sense. It also does not change the licensing relationship you or anyone else has with Microsoft.
It is, however, a way that you can take ownership of a computer purchased second hand or change the name of the owner to something other than what the original manufacturer entered when Windows 7 was first loaded onto the computer.
This trick is particularly useful when a name changes because of a marriage. A woman who changes her name after marriage can update the owner of the machine to reflect her new name.

Thursday 27 October 2011

Error "Registry editing has been disabled by your administrator" when you open the Registry Editor in Windows Vista

Symptom

When you attempt to start the Registry Editor (regedit.exe) in your Windows Vista system, you may receive the following message:
Registry editing has been disabled by your administrator

Resolution

If the above error message is shown in a standalone system, then it may be a result of Malware infection. It is also possible that the DisableRegistryTools policy had been enabled by a third-party tweak program which you may be using. It's highly advisable to follow up with a complete system checkup for Virus and Malware, especially when you're unsure about the cause.
Note: If your system is connected to a domain, your network administrator may have enabled the DisableRegistryTools Policy setting. In that case, you'll need to contact the network administrator to relax this restriction, if need be.

Method 1 - Using Group Policy Editor

If you are using an edition of Windows Vista (Windows Vista Business, Enterprise and Ultimate editions) which includes the Group Policy Editor, follow these steps:
  • Click Start, type gpedit.msc in the Search box, and press ENTER
  • Go to the following branch:
User Configuration | Administrative Templates | System
  • Double-click Prevent access to registry editing tools
  • Set it as Not Configured
Important: If it's already set to Not Configured, set it to Enabled and click Apply. Then repeat the steps and revert the setting back to Not Configured. This removes the registry based policy if set already.

Method 2

This method should work in all editions of Windows Vista.
  • Download reg_enable.vbs attached at the end of this article, and save it to Desktop
  • Open an elevated command prompt. To do this, click Start, click All Programs, click Accessories, right-click Command Prompt, and then click Run as administrator. If you are prompted for an administrator password or for a confirmation, type the password, or click Allow.
  • Switch to your Desktop directory by typing the following command, and then pressing ENTER:
cd /d %userprofile%\desktop
  • Then, type the following command and press ENTER
wscript.exe  reg_enable.vbs
  • Type EXIT to close the Command Prompt window.
If everything worked fine, the DisableRegistryTools policy should have been removed by now. See if you're able to launch Regedit.exe now

Fix for RICHTX32.OCX Component Error When Running a Program

When you run an application which was created in Visual Basic 6.0, the following error message may occur and the program terminates.


Component ‘RICHTX32.OCX’ or one of its dependencies not correctly registered: a file is missing or invalid.
 
This happens if the program uses Rich TextBox ActiveX Control (RichTx32.ocx), but does not include the ActiveX file in the setup package.


To resolve the problem, download RichTx32.zip. Unzip the archive and extract the file RichTx32.ocx to the Windows\System32 folder.

Note that the VB6 run-time distribution package from Microsoft does not include the RichTx32.ocx ActiveX Control.

Registering the OCX file

If you still receive the error, register the RichTx32.ocx module using the following command (from Start, Run dialog):

regsvr32.exe %systemroot%\system32\RICHTX32.OCX
 
You should see the message DllRegisterServer in C:\WINDOWS\system32\RICHTX32.OCX succeeded. after running the above command.

How to Create a Password Reset Disk and Use It to Reset Forgotten Password in Windows 7


You can create a password reset disk in Windows 7, Windows Vista and Windows XP, so that you can regain access to the system quickly in the event of a forgotten password, without having to use third-party boot environment CDs and tools. Microsoft suggests that you create a password reset disk after creating the user account and assigning the password. Here is a walkthrough on how to create a password reset disk in Windows 7.

Creation of password reset disk requires a USB flash disk (or) a floppy disk drive to be present in the system. My suggestion is that you use a flash drive even though your system may have a floppy drive, since floppy disks are unreliable. If you have a spare flash drive or a low-capacity one (that you don’t plan to use) left in your table drawer, then it’s a good idea to use it as a password reset disk. Note that the password reset disk wizard uses less than 2 KB to store a file named userkey.psw in the drive.

Create a Password Reset Disk in Windows 7

Prerequisites: You should remember the current user account password in order to create the Password Reset Disk. And, the Password Reset Wizard needs a USB flash disk connected, or a floppy disk inserted into the drive.
Connect a USB flash drive to the PC.
Click Start, type password reset disk in the Search box, and click Create a password reset disk in the Start menu search results.


Note: If you haven’t connected a USB flash drive or inserted a floppy disk yet, the following message box appears, asking to insert a floppy disk or connect a USB flash drive.


Click Next, select the USB flash drive letter and click Next.


Type in the current user account password and click Next.


The password reset disk wizard create a file named userkey.psw (less than 2 KB)


Reset Forgotten Password Using the Password Reset Disk

If you forget the user account password in future, you can reset the password using the USB flash drive that you created earlier. Use these steps to reset the password:
In the Welcome Screen, select the user account, type an incorrect password in the Password box, and then click OK.
You’ll see the password hint message and a "Reset password…" link underneath. Click "Reset password…"
This starts the Password Reset Wizard. Insert the Password Reset Disk (thumb drive) and you’ll be asked to assign a new password for that user account.


Fix Services MMC Error “One or More ActiveX Controls Could Not Be Displayed”

When you open the Services MMC (services.msc), the following errors appear, and the list of services may or may not display after dismissing the error message dialog boxes.
One or more ActiveX controls could not be displayed because either:
1) Your current security settings prohibit running ActiveX controls on this page, or
2) You have blocked a publisher of one of the controls.
As a result, the page might not display correctly.


… followed by the error Object doesn’t support property or method ‘ConnectTo’ in URL mmcndmgr.dll/views.js.


Resolution

Run the Fix-It Solution from Microsoft


[Windows 7 Users] Download the Fix it solution by clicking the image above, and run the executable. The problem should be taken care of, automatically.

To Fix the Problem Manually

1. Click Start, type Regedit.exe and press {ENTER}

2. Navigate to the following branch:

HKEY_CURRENT_USER \ Software \ Microsoft \ Windows \ CurrentVersion \ Internet Settings \ Zones
 

3. Under the Zones key, delete the subkey shown with an ASCII character, as in the above graphic. If it doesn’t exist, ignore and proceed to the following registry key:
HKEY_CURRENT_USER \ Software \ Microsoft \ Windows \ CurrentVersion \ Internet Settings \ Zones \ 0
 

4. Double-click the DWORD value named 1200, and type 0 as its value data.


The DWORD value 1200 corresponds to IE Security Zone setting "Run ActiveX controls and plug-ins". Setting the value to 0 permits ActiveX controls and plug-ins.

5. Exit the Registry Editor.

6. Logoff and login back to your account.

Tuesday 25 October 2011

Remove xp or ubuntu from dual boot in windows 7

If you install your windows 7 dual boot with windows xp or ubuntu and you want to remove xp or ubuntu now,you can use bcdedit to remove xp or ubuntu from boot loader of windows 7,then remove the OS folders even format the partition (Please backup useful data before removing / formating action).Below is a step by step guide to remove xp or ubuntu from dual boot in windows 7

1.Open an Elevated Command Prompt in windows 7    (Go to StartAll Programs – Accessories, then right click Command Prompt and click on Run as administrator)

2.Type command bcdedit then press Enter ,we can see the identifier of xp is {ntldr} ,the same way you can find your ubuntu’s identifier


3.Using below command to remove xp or ubuntu from your boot loader
bcdedit /delete {identifier} /f
Eg:
a) Remove xp from dual boot in windows 7
bcdedit /delete {ntldr} /f


b)Remove ubuntu from dual boot in windows 7
bcdedit /delete {identifierofubuntu}
 
4.Reboot,you will find xp or ubuntu has been removed from boot loader,and then you can format xp’s or ubuntu’s parition to remove it completely.

Note:Please make sure you have backup all useful data before formatting the partition

Enable Windows Media Player Taskbar Toolbar in Windows 7

First thanks Justin Buser found this trick to enable WMP(Windows Media Player) 12 taskbar toolbar in Windows 7

1.Download wmpband.dll from below link .(You can right-click Computer then click Properties to check your Win 7 is 32bit or 64bit)
                                 wmpband-32bit
                                 wmpband-64bit

2.Unzip the .zip file and put wmpband.dll to your C:\Program Files\Windows Media Player

3.Open an Elevated Command Prompt   (Press Yes if prompted by UAC)


4.Run the below 3 commands one by one in your command prompt window
sc stop WMPNetworkSvc
 
regsvr32 "%programfiles%\Windows Media Player\wmpband.dll"
 
sc stop WMPNetworkSvc


5.Restart your WMP and Minimize it,right click your taskbar to enable taskbar toolbar for Windows Media Player