you can even use the PowerShell command line shell to disable or enable any network adapters that you don't use on your PC.
Disabling adapter
To disable a Wi-Fi or Ethernet network adapter on Windows 10 using PowerShell, use these steps:- Open Start.
- Search for Windows PowerShell, right-click the top result, and select Run as administrator.
-
Type the following command to identify the name of the adapter you want to disable and press Enter:
Get-NetAdapter | format-table
-
Type the following command to disable the Wi-Fi or Ethernet adapter and press Enter:
Disable-NetAdapter -Name "YOUR-ADAPTER-NAME" -Confirm:$false
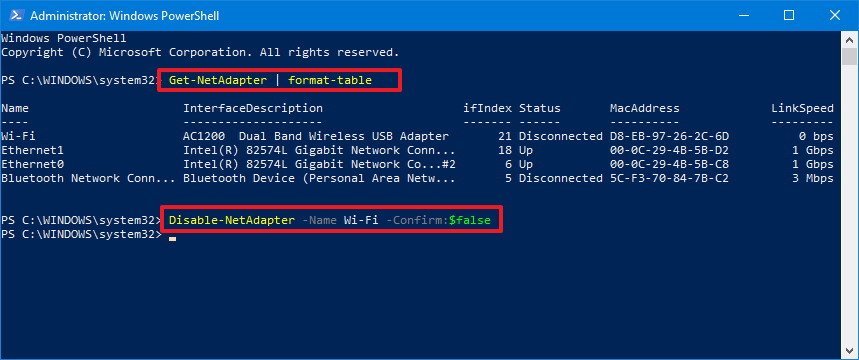
In the command remember to specify the name of the adapter you want to disable. The quotation marks are only required if there are spaces within the name.
Enabling adapter
To enable a network adapter on Windows 10 using PowerShell, use these steps:- Open Start.
- Search for Windows PowerShell, right-click the top result, and select Run as administrator.
-
Type the following command to identify the name of the adapter you want to enable and press Enter:
Get-NetAdapter | format-table
-
Type the following command to disable the Wi-Fi or Ethernet adapter and press Enter:
Enable-NetAdapter -Name "YOUR-ADAPTER-NAME" -Confirm:$false

In the command remember to specify the name of the adapter you want to enable. The quotation marks are only required if there are spaces within the name.
No comments:
Post a Comment